
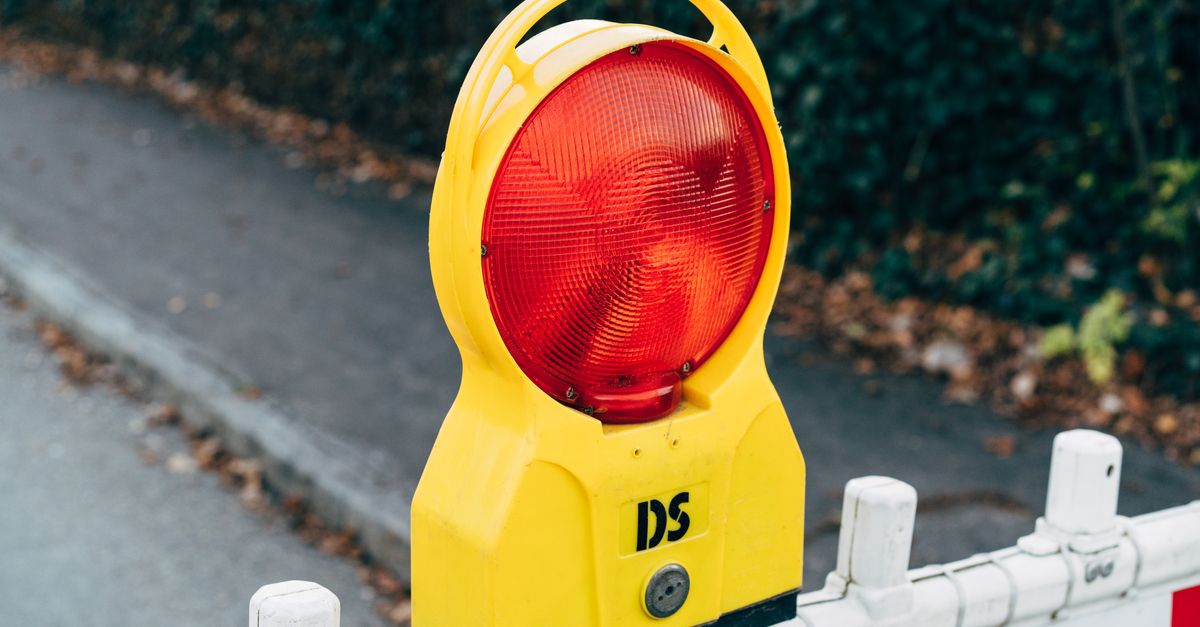
Your car breaks down on a busy highway. Traffic zooms past at 65 mph. What do you do first? Roadside visibility safety isn't just about looking out for yourself. It's about making sure other drivers see you before it's too late.
Most accidents involving disabled vehicles happen because drivers don't realize someone's stranded ahead. Proper roadside visibility prevents collisions, injuries, and worse. Let's walk through the exact steps to stay safe.
Why Roadside Visibility Matters So Much
Every year, thousands of accidents happen on roadsides. Many could've been prevented with basic visibility tools. When your vehicle breaks down, you're at serious risk.
Drivers traveling at highway speeds need time to react. At 55 mph, a car travels about 121 feet per second. That's less than 3 seconds to see you and stop. Without proper warnings, you're nearly invisible.
Roadside visibility safety saves lives. It protects you, your passengers, and other drivers. It's also legally required in most states. Getting this right isn't optional—it's essential.
How Hazard Lights Work as Your First Defense
Your hazard lights (also called emergency flashers) are your first line of defense. Turn them on immediately when your vehicle stops unexpectedly.
Hazard lights flash at about 60-120 times per minute. This rhythm makes them visible from much farther away than steady lights. They work day and night, though they're less effective in bright sunlight.
Here's the thing: hazard lights alone aren't enough. Drivers might miss them in heavy traffic or bad weather. That's why you need backup visibility tools. But hazard lights buy you critical time while you set up other warnings.
Pro tip: Some newer cars automatically activate hazard lights during emergency braking. Check your vehicle's manual to see if yours does.
When Should You Turn On Your Hazard Lights?
Turn on hazard lights the moment you realize you're stranded. Don't wait. Don't think about it. Just do it immediately.
Hazard lights should stay on continuously while you're disabled on the roadside. Keep them running even during daylight. Even in bright sun, they add an extra visual element that catches attention.
You should also use hazard lights when:
- Driving slowly due to mechanical problems
- Pulling over to the shoulder for any reason
- Waiting for roadside assistance or a tow truck
- Traveling in heavy rain or fog (beyond normal brake lights)
- Moving through construction zones at reduced speed
Some drivers worry about draining their battery by running hazard lights. Don't. Modern vehicles are designed to run hazard lights for extended periods without depleting the battery significantly. Your safety matters more than a few amps.
Understanding Reflective Warning Triangles and Placement
Reflective warning triangles are your second visibility layer. They're bright, reflective, and highly visible—especially at night. Every emergency kit should include at least two triangles.
These triangles use retroreflective material that bounces light directly back to its source. When headlights hit them, they glow brightly. This makes them visible from much farther away than regular objects.
Quality matters here. Cheap triangles fade quickly and lose reflectivity. Invest in triangles that meet DOT or FMVSS standards. They cost $15-30 for a set of three and last years.
Store triangles in your car at all times. Keep them in a trunk organizer or roadside emergency kit. You won't use them often, but when you need them, you'll be grateful they're there.
How to Place Warning Triangles Correctly
Placement is everything with warning triangles. Incorrect placement defeats their purpose. Here's how to do it right:
- Place the first triangle 10 feet behind your vehicle. This creates an immediate warning zone.
- Place the second triangle 100 feet behind the first. On highways, place it 100-300 feet back depending on visibility.
- Place a third triangle 100 feet ahead if you have one and if it's safe to do so.
- Always place triangles on the shoulder where they won't be hit by traffic.
- Angle them toward oncoming traffic. You want drivers to see them head-on.
On highways, use the maximum distance—300 feet. On rural roads with good visibility, 100 feet is fine. In cities with lower speed limits, 50-100 feet works.
Never place triangles in the traffic lane. Stay as far from traffic as safely possible when setting them up. Your safety matters more than perfect triangle placement.
Warning: If you're on a divided highway with a median, you typically only need triangles behind your vehicle. The median protects oncoming traffic.
Using Road Flares and Reflectors Effectively
Road flares add another layer of visibility, especially at night. They burn brightly and are visible from great distances. However, they require careful handling.
There are two types of flares: chemical and battery-powered. Chemical flares burn for about 15-20 minutes. Battery-powered LED flares last much longer and are safer.
Chemical flares work well but have downsides. They get hot (up to 1,500°F), can ignite nearby objects, and produce fumes. They're also single-use. Once lit, you can't turn them off.
LED flares are becoming more popular. They're reusable, safer, and last for hours. They cost more upfront but save money long-term. Many roadside assistance providers now recommend LED flares over chemical ones.
Place flares at the same distances as triangles. Put the first one 10 feet back, then space additional flares 100 feet apart. In daylight, flares are less effective than triangles. Use them primarily at night or in low-light conditions.
Combining All Three Visibility Tools for Maximum Safety
The best roadside visibility strategy uses all three tools together. Hazard lights, triangles, and flares create multiple warning signals that are hard to miss.
Here's your complete visibility setup:
- Turn on hazard lights immediately
- Exit your vehicle safely if possible
- Place warning triangles at proper distances
- Add flares or LED lights if visibility is poor
- Stay in your vehicle or stand safely away from traffic
- Call for help using roadside assistance
This layered approach gives you three separate warning systems. Even if a driver misses one, they'll likely see another. That redundancy could save your life.
In fog, rain, or darkness, all three tools become even more critical. Don't skimp on visibility during bad weather. That's exactly when accidents are most likely.
State Laws and Visibility Requirements You Need to Know
Most states require vehicles to have hazard lights and warning devices. However, specific requirements vary. Some states mandate warning triangles. Others allow flares. A few accept reflective vests as alternatives.
Federal regulations (FMVSS) require hazard lights on all vehicles. Warning triangles aren't federally mandated but are required by many states, especially for commercial vehicles.
Check your state's specific requirements. Visit your state's Department of Transportation website. Look for regulations on emergency equipment and roadside visibility.
Most states recommend:
- Functional hazard lights on all vehicles
- At least two warning triangles or flares
- Reflective vests for the driver and passengers
- A flashlight with extra batteries
- A first aid kit
Having these items isn't just smart—it's often legally required. Police can ticket you for missing emergency equipment. More importantly, it protects you during real emergencies. For detailed state-specific requirements, check towing laws by state resources.
Visibility Challenges in Different Weather and Light Conditions
Visibility isn't one-size-fits-all. Different conditions require different approaches. Let's break down the toughest scenarios.
Heavy rain: Hazard lights become your most important tool. Triangles and flares are harder to see through rain. Space them closer together—50-75 feet instead of 100-300 feet. Wear a reflective vest to make yourself visible if you exit the vehicle.
Fog: Fog kills visibility quickly. Use LED flares and triangles at closer distances. Hazard lights cut through fog better than you'd think. Consider a reflective traffic vest—it's one of the most visible items you can wear.
Darkness: This is when flares and LED lights shine. Chemical flares burn bright enough to be seen from over a mile away. LED flares last longer and are safer. Reflective triangles glow under headlights. Use all three if possible.
Bright daylight: Hazard lights are less visible in bright sun. Triangles work well because of their color and reflectivity. Flares are nearly invisible in daylight. Rely on hazard lights and triangles during the day.
Construction zones: Use extra caution here. Place triangles and flares closer together. Wear a reflective vest. Construction workers and heavy equipment operators might not see you as quickly as regular traffic.
Building Your Emergency Roadside Visibility Kit
Every vehicle should have a complete visibility kit. Store it in your trunk and check it twice a year. Here's what you need:
- Warning triangles: At least two, preferably three. Choose DOT-approved reflective ones.
- LED flares or chemical flares: A set of four to six. LED flares are reusable and safer.
- Reflective vest: High-visibility orange or yellow. Wear it if you're standing outside your vehicle.
- Flashlight: With extra batteries. Choose one that's bright and durable.
- Jumper cables: For battery issues that might leave you stranded.
- Tire repair kit: For quick fixes that might get you to safety.
- Phone charger: USB car charger so you can call for help.
For detailed guidance on emergency kits, check our emergency roadside kit essentials guide. A complete kit costs $50-100 and could save your life.
Common Visibility Mistakes That Put You at Risk
Many drivers make dangerous mistakes with roadside visibility. Here are the ones to avoid:
Forgetting to turn on hazard lights: This is the number one mistake. Some drivers focus on other tasks and forget. Make it automatic—lights on, then everything else.
Placing triangles too close: Drivers traveling at highway speeds need distance to react. Placing triangles only 20 feet back isn't enough. Stick to 100-300 feet.
Standing in the traffic lane: Never stand between your vehicle and traffic. Always stand on the shoulder, preferably away from both directions. Wear a reflective vest so you're visible too.
Using old or faded triangles: Triangles lose reflectivity over time. If yours are more than 5 years old, replace them. Faded triangles won't reflect light properly.
Skipping flares in low light: Many drivers think hazard lights are enough. They're not. Add flares when visibility is poor. The extra warning could prevent a collision.
Not checking your kit: Emergency equipment doesn't last forever. Check your kit every six months. Replace dead batteries, faded triangles, and expired flares.
When to Call for Professional Help and What to Expect
Once you've set up your visibility warnings, call for help. Don't try to fix major problems yourself on the roadside. It's dangerous and usually unsuccessful.
Contact a professional towing service if you:
- Have a mechanical failure you can't diagnose
- Have a flat tire you can't change safely
- Are stranded on a busy highway
- Need to move your vehicle more than a mile
- Have been in an accident
- Have multiple problems with your vehicle
Professional tow truck drivers are trained to work safely on roadsides. They know how to position their vehicles to protect yours. They have all the right equipment. Using professional towing services keeps you safe and gets your vehicle handled properly.
While waiting for help, stay in your vehicle with the doors locked if you're on a busy road. Keep hazard lights running. Check your visibility warnings periodically to make sure they haven't been disturbed.
If a tow truck arrives, verify it's legitimate before approaching. Check the company name, driver ID, and vehicle markings. Scam tow trucks do exist. Legitimate companies display clear branding and professional credentials.
Frequently Asked Questions About Roadside Visibility Safety
Q: How long can I run my hazard lights before my battery dies?
A: Modern vehicles can run hazard lights for 24+ hours without significant battery drain. Hazard lights use very little power. Don't worry about battery depletion—your safety is the priority.
Q: Can I use my phone's flashlight instead of warning triangles?
A: No. Phone flashlights aren't visible from far enough away. They also drain your phone battery quickly. Use proper warning triangles or flares. Your phone should stay charged for calling help.
Q: Are LED flares better than chemical flares?
A: LED flares are safer, reusable, and last longer. Chemical flares burn hot and are single-use. For most drivers, LED flares are the better choice. They cost more upfront but save money long-term.
Q: How often should I replace my warning triangles?
A: Replace triangles every 5-7 years or when they lose reflectivity. Check them twice yearly. If they look faded or damaged, replace them immediately. Visibility depends on reflectivity, so don't use old triangles.
Q: What's the best reflective vest color?
A: Bright orange or yellow vests are most visible. Some studies suggest lime-yellow is slightly more visible than orange. Either works well. Wear one whenever you're standing outside your vehicle on a roadside.
Key Takeaways for Staying Safe on the Roadside
Roadside visibility safety comes down to three tools used together: hazard lights, warning triangles, and flares. Each serves a purpose. Together, they create multiple warning signals that protect you and other drivers.
Your action plan is simple:
- Keep a complete visibility kit in your vehicle at all times
- Turn on hazard lights immediately when you break down
- Place warning triangles 100-300 feet behind your vehicle
- Add flares or LED lights in low-light conditions
- Wear a reflective vest if you exit your vehicle
- Call professional help rather than attempting roadside repairs
- Check your visibility kit twice yearly
Proper roadside visibility prevents accidents. It protects you, your passengers, and other drivers. It's not complicated, but it requires preparation and quick action.
Start today. Check your vehicle's hazard lights. Buy a quality set of warning triangles if you don't have them. Add LED flares and a reflective vest to your emergency kit. These investments cost under $100 but could save your life.
When you're stranded, you'll be grateful you took these steps. And you'll have the peace of mind knowing you're doing everything possible to stay safe.
Disclaimer: Visibility requirements vary by state. Check your state's Department of Transportation website for specific legal requirements. This guide provides general safety recommendations applicable across most U.S. states as of 2026.
Frequently Asked Questions
Need Emergency Towing Services?
Don't wait when you're stranded. Get professional help now.
Find Professional Towing Help Now


Discussion (0)
Be the first to comment!
Share your experience or ask questions about towing services.